FAQ: Work Instruction App Usage
If you are the first in your company to use the Work Instruction App, you can simply register yourself as a new user. Adding a new user to an existing company account is described further on this page. To do this, click on the log in button in the menu on the main page. You will then see the login screen:
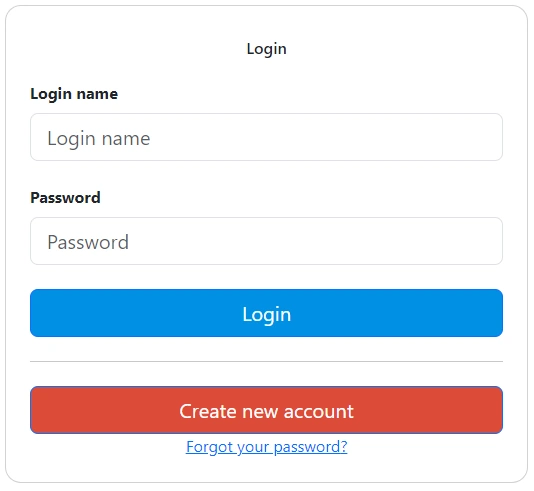
Press the “Create new account” button here.
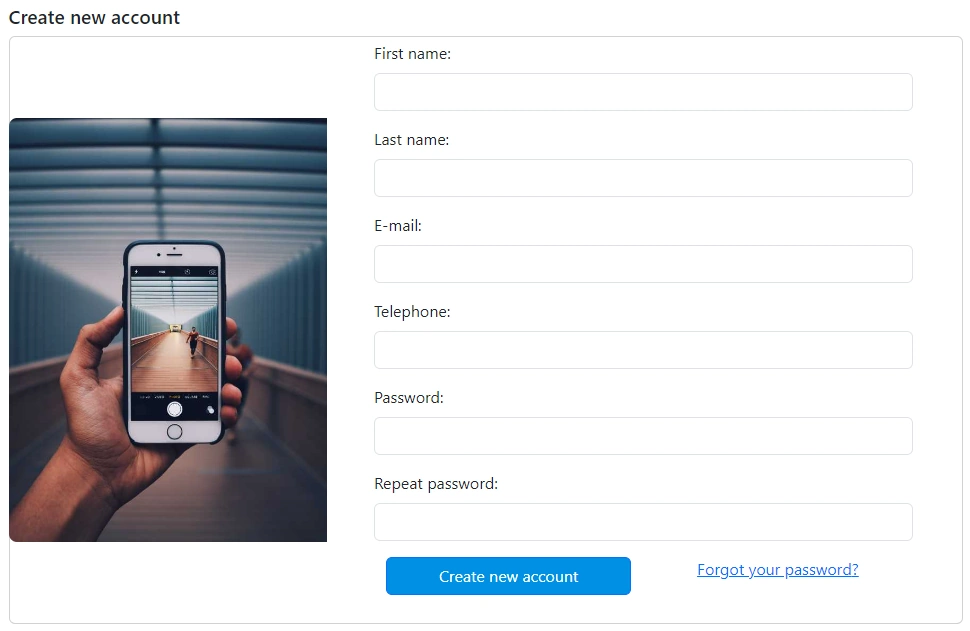
Then fill in the required information and press the “Create new account” button.
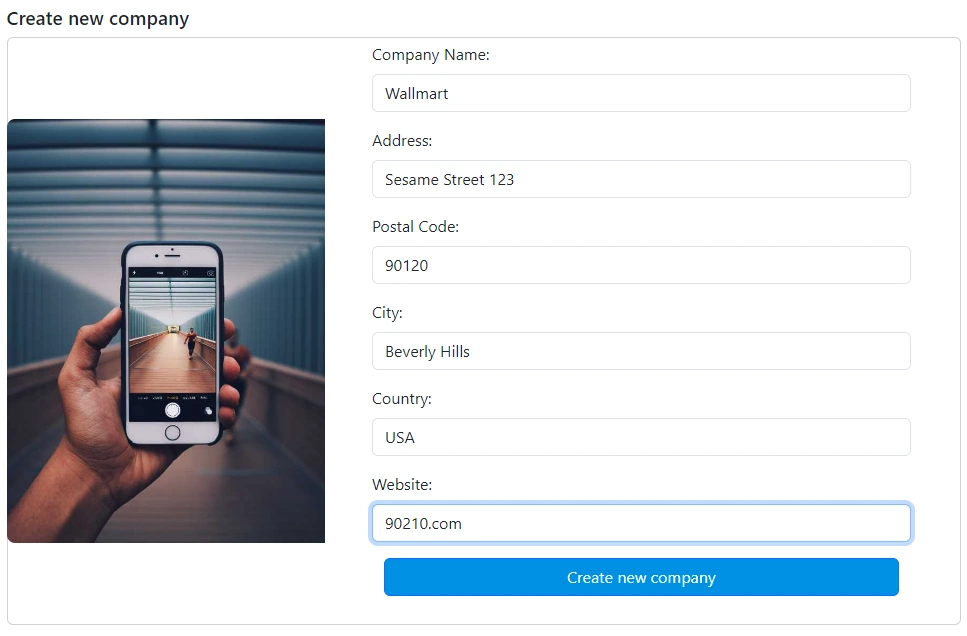
Then fill in the details of your company and press the “Create new company” button:
After this, you have created an account and you can immediately get started with the Work Instruction App.
Yes, you can login with Microsoft Entra ID.
To log in with Microsoft Entra ID, click the "Sign in with Microsoft" button.

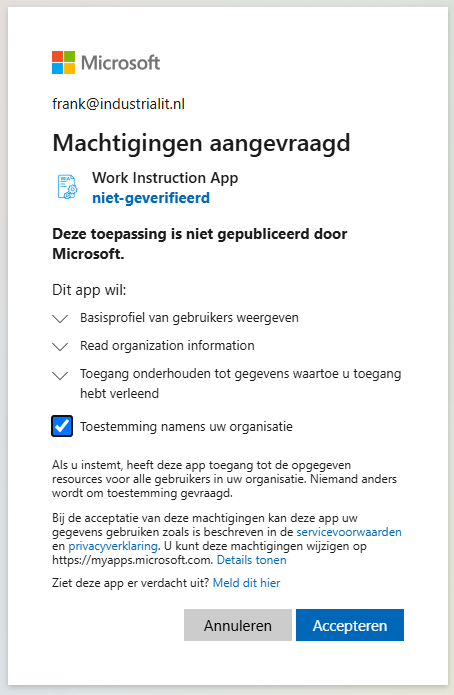
Log in there with your Microsoft Entra ID business account. When you log in for the first time, you'll need to give us permission to use some data, such as your name and email address. Give us permission to do this:
After giving permission, you will be returned to the Work Instruction App and can get started right away.
To add a new user to an existing company you need a Manage subscription. To do this, go to the management page by clicking on the Manage link in the menu:

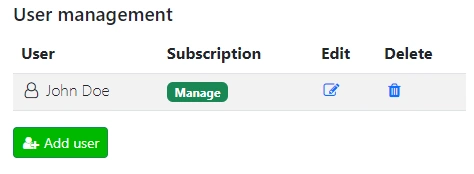
Then click the “User management” button:

Under User Management you will see all registered users who are linked to your administration. To add a new user, press the green “Add user” button.
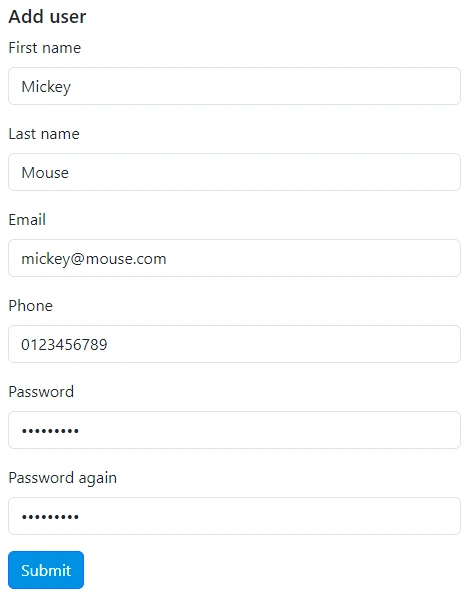
Fill in the requested information to create a new user:
After pressing the “Submit” button, the user is added:
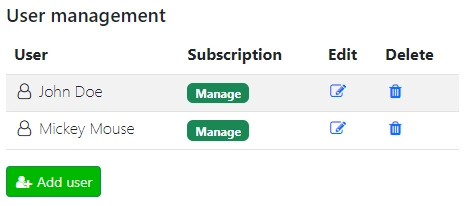
Inform the newly created user that they can log in with their email address and the entered password.
With a Manage subscription, you can create a new company. You can manage and execute workflows separately for each company.
To give users rights to a company you need a Manage subscription. Go to the management page:
Then click the “User management” button:
There you will see an overview of all companies linked to your account:

If a green check mark is visible in the status of a user, this user has rights to participate in the company. Use the plus button to give users access, and the trash icon to remove access rights.
To create a new company you need a Manage subscription. Click on the company name that is currently active in the menu to begin:
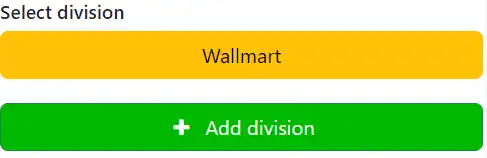
Here you will see an overview of all companies linked to your account. By clicking on one of the company names you can switch between companies. To create a new company, click the “Add division” button:
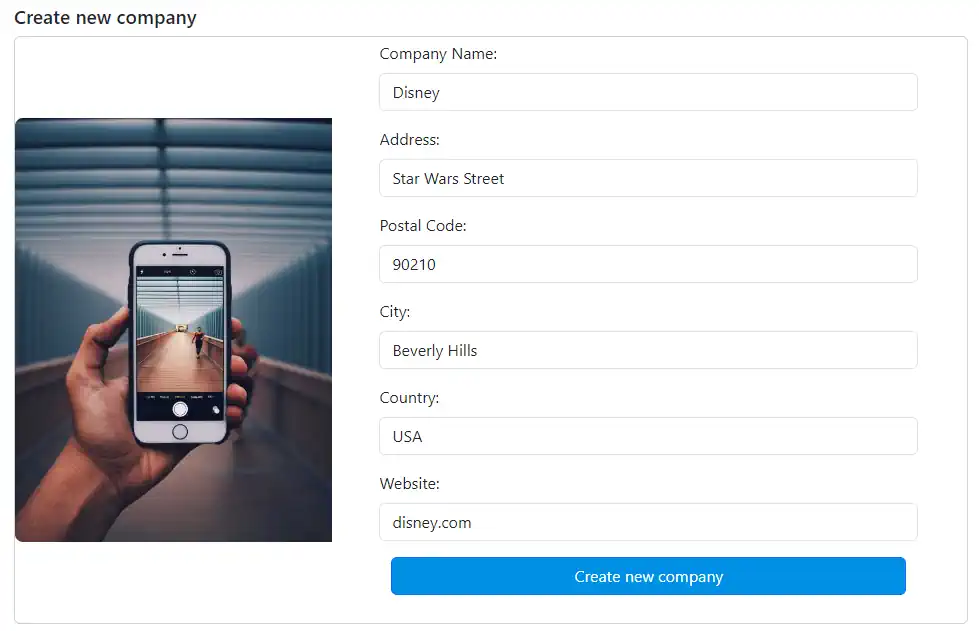
Enter the requested data and press the “Create new company” button:
To allow public work instructions, this must be activated for the entire company.
To do this, enable the "Allow public work instructions" option in the settings under the General tab. Save this setting.

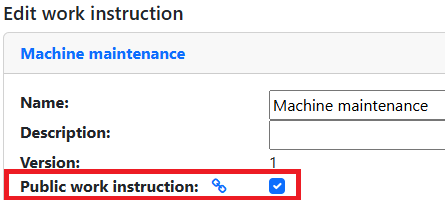
Next, you need to activate public access for the work instruction that you want to be publicly accessible.
To do this, edit the work instruction and check the "Public work instruction" option:
Publish the work instruction to activate public access.
To obtain the public link, go to the work instruction's edit screen. Then click the link icon:
On the next page, you can find the public link. This is available as both a QR code and a text link.
Depending on the device you use, you can also program an NFC tag with this link.
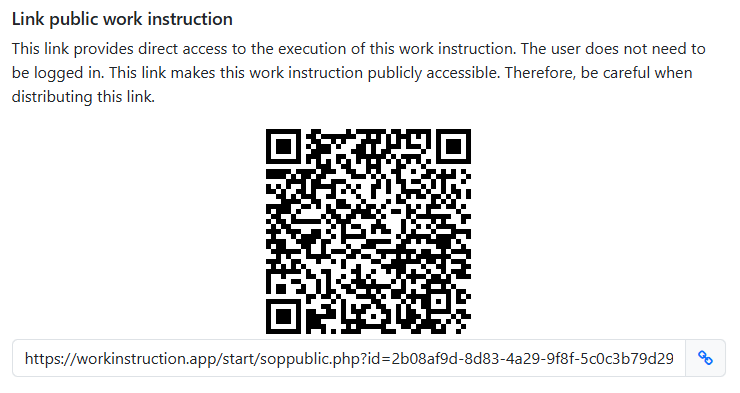
This link allows users to perform the work instructions without logging in.