



Device input in SOPs and work instructions
Last updated:
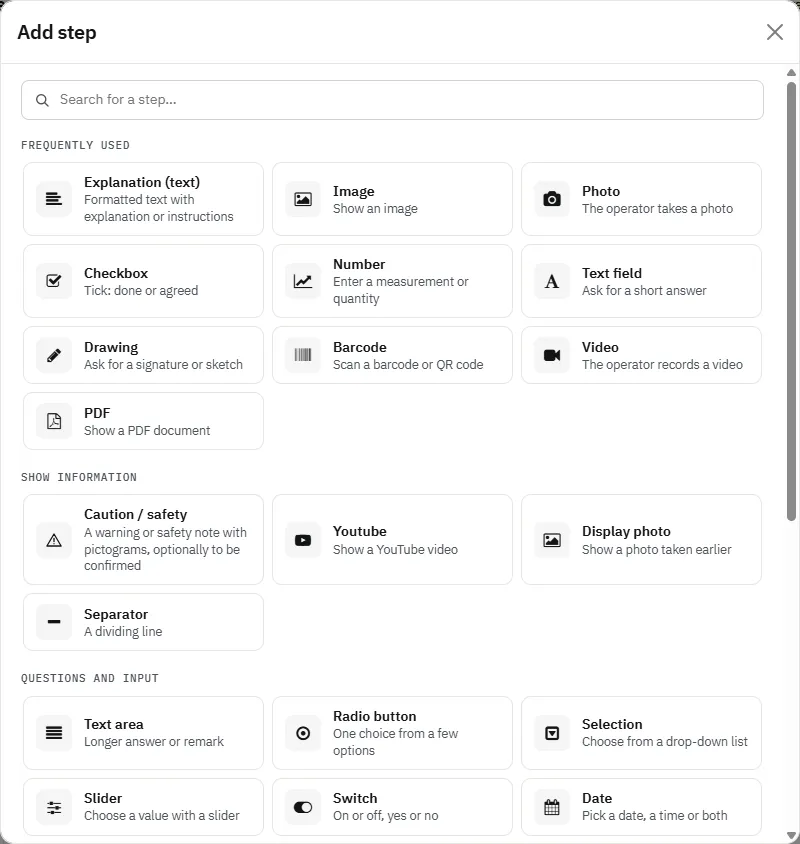
Device input steps use the phone or tablet itself to capture evidence during a work instruction: a photo, a video, an audio recording, a barcode or QR scan and the GPS location. The recording is stored with the run, so you see exactly what the operator saw, where and when.
Use the phone or tablet itself to capture evidence while the work is done. This guide explains every device input step of the Work Instruction App: take a photo, record a video or a spoken note, scan a barcode, record the location or attach a file. Each section shows the step as the operator sees it and how to add it.
Device input steps use the camera, microphone and GPS of the phone, tablet or PC that runs the work instruction. What they capture is stored with the run, so the run details show the photo, the recording or the scanned code next to the step, with the user and the time.
How to add a step
Every page of a work instruction is built from steps. Adding one works the same for every step type:
- Open the editor. Create a new work instruction or open an existing one and choose Edit.
- Pick a step. Click Add step and choose the step in the step picker. The search field finds a step by name, description or a related word: scrap finds the Counter, four eyes the Colleague check.
- Set the label. Give the step a short, clear label: the operator sees it above the step. Click the step to change its label, width or required setting.
- Publish. Changes are saved as a draft automatically. Click Publish to make the new version available to operators.
Record audio
The Record audio step lets the operator record a spoken note or a sound with the microphone, for example a handover message for the next shift or the noise of a bearing. A recording lasts at most one minute; while recording, the time left counts down next to the stop button, so the recording never ends unexpectedly. The recording is stored with the run.
Add it to a work instruction
- Open the work instruction in the editor and click Add step under the last step.
- Choose Record audio in the group Capture with the device of the step picker, or type the name or a related word in its search field. Steps your organisation uses often are listed first, under Frequently used.
- Label it with what should be recorded, for example Voice note for the next shift. The browser asks once for permission to use the microphone; keep the note under a minute, the countdown next to the stop button shows the time left.
- Switch on Required in the step properties when the operator must fill it in before going on.

Barcode
The Barcode step lets the operator scan a barcode or QR code with the camera of the device or a hand scanner, or type it, for example the order label, a batch number or the code of the right material. With an expected value, a different code is marked and blocks Next and Finish.
Add it to a work instruction
- Open the work instruction in the editor and click Add step under the last step.
- Choose Barcode in the group Frequently used of the step picker, or type the name or a related word in its search field. Steps your organisation uses often are listed first, under Frequently used.
- Label it with what is scanned, for example Scan the order label. The operator scans with the camera or a hand scanner, or types the code. Fill in an Expected value when only one code is right: a different code is marked and blocks Next and Finish.
- Switch on Required in the step properties when the operator must fill it in before going on.

Location
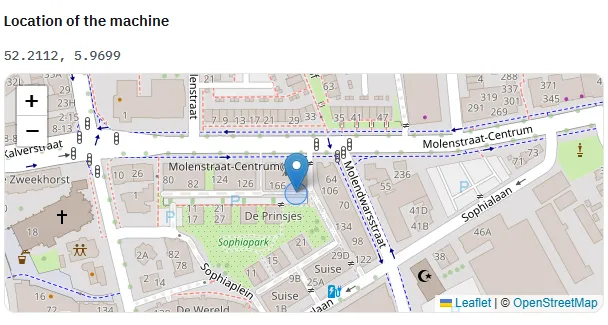
The Location input field allows a user to provide the current GPS location from their device when completing a Standard Operating Procedure.
Add it to a work instruction
- Open the work instruction in the editor and click Add step under the last step.
- Choose Location in the group Capture with the device of the step picker, or type the name or a related word in its search field. Steps your organisation uses often are listed first, under Frequently used.
- The device records its GPS position and shows it on a map. The browser asks the operator once for permission to use the location.
- Switch on Required in the step properties when the operator must fill it in before going on.
Take photo
The Take photo step lets the operator take a picture with the camera of the device during the run, for example of the finished part or of a defect. With marking up switched on, the operator can draw arrows, circles and text on it. The photo is stored with the run.
Add it to a work instruction
- Open the work instruction in the editor and click Add step under the last step.
- Choose Take photo in the group Frequently used of the step picker, or type the name or a related word in its search field. Steps your organisation uses often are listed first, under Frequently used.
- Label it with what should be in the picture. The operator takes the photo with the camera; it is stored with the run and opens enlarged in the report. Switch on marking up to let the operator point out a defect with an arrow, circle or text; the report shows the marked photo with a link to the original.
- Switch on Required in the step properties when the operator must fill it in before going on.
Record video
The Record video step lets the operator record a video with the camera of the device, for example of a test run or of a fault that only shows while the machine runs. The video is uploaded and stored with the run.
Add it to a work instruction
- Open the work instruction in the editor and click Add step under the last step.
- Choose Record video in the group Frequently used of the step picker, or type the name or a related word in its search field. Steps your organisation uses often are listed first, under Frequently used.
- Label it with what should be filmed. The browser asks once for permission to use the camera; the video is stored with the run.
- Switch on Required in the step properties when the operator must fill it in before going on.
Attach file
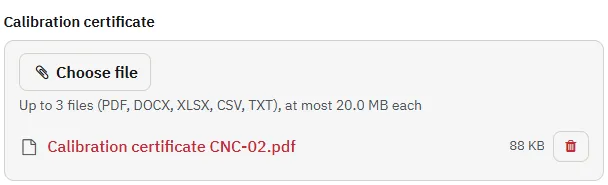
The Attach file step lets the operator add files to a run, for example a measurement report, a delivery note or a picture from the phone gallery. Choose on the step how many files may be added (1 to 5) and which kind: documents (PDF, Word, Excel, CSV and text), images (JPG, PNG, WebP and HEIC) or both. Each file is uploaded straight away, at most 20 MB, and checked on its real content; web pages, scripts and programs are always refused. The run details, the print and the export link to the files, which download with their original name. Made required, the operator can only go on with at least one file. Adding a file needs a connection.
Add it to a work instruction
- Open the work instruction in the editor and click Add step under the last step.
- Choose Attach file in the group Capture with the device of the step picker, or type the name or a related word in its search field. Steps your organisation uses often are listed first, under Frequently used.
- Choose Documents when you expect a report or a delivery note and Images for pictures from the gallery; for a photo taken on the spot the Photo step is quicker. Name the step after what you expect, for example Calibration certificate.
- Switch on Required in the step properties when the operator must fill it in before going on.
Other input types
Try the Work Instruction App for free
Create your first digital work instruction in minutes. 30-day free trial, no credit card required.
No credit card · Cancel any time · Live in 5 minutes
Frequently asked questions about device input
Take photo, record video, record audio, barcode, location (GPS) and attach file. They use the camera, microphone and location of the phone, tablet or PC that runs the instruction.
No. The Barcode field scans with the camera of the device. QR codes can be scanned the same way.
Yes. They are saved with the executed instruction, so in Analyze you see the photo next to the step, the user and the time. For text, numbers and signatures, see user input.
Yes. Fill in an Expected value in the step properties. A scanned or typed code that differs is marked and Next and Finish only work once the right code is scanned, so the wrong part or label is noticed on the spot. See deviations and checks.