



User input types in SOPs and work instructions
Last updated:
User input steps are the fields an operator fills in during a work instruction: tick off, date, signature, number, spot on a floor plan, single choice, drop-down list, slider, switch, text field and long text, and for checks OK / Not OK, a checklist, a rating, a counter and a colleague check. Every answer is stored with the run, and a Not OK or a value outside its norm is recorded as a deviation, so a digital form replaces the paper checklist.
Collect structured data while the work is done. This guide explains every input step of the Work Instruction App: from a simple tick or a number with its unit to an OK / Not OK check, a checklist of check points, a counter for scrap and a colleague who confirms a critical step. Each section shows the step as the operator sees it, how to add it and what the run records.
Input steps ask the operator for an answer while carrying out a work instruction. Every answer is stored with the run, together with the user and the time; checks with a norm or a Not OK answer are recorded as deviations, so they show up in the runs overview, the run details and the dashboard. Steps that use the camera, microphone or GPS are in the guide to device input.
How to add a step
Every page of a work instruction is built from steps. Adding one works the same for every step type:
- Open the editor. Create a new work instruction or open an existing one and choose Edit.
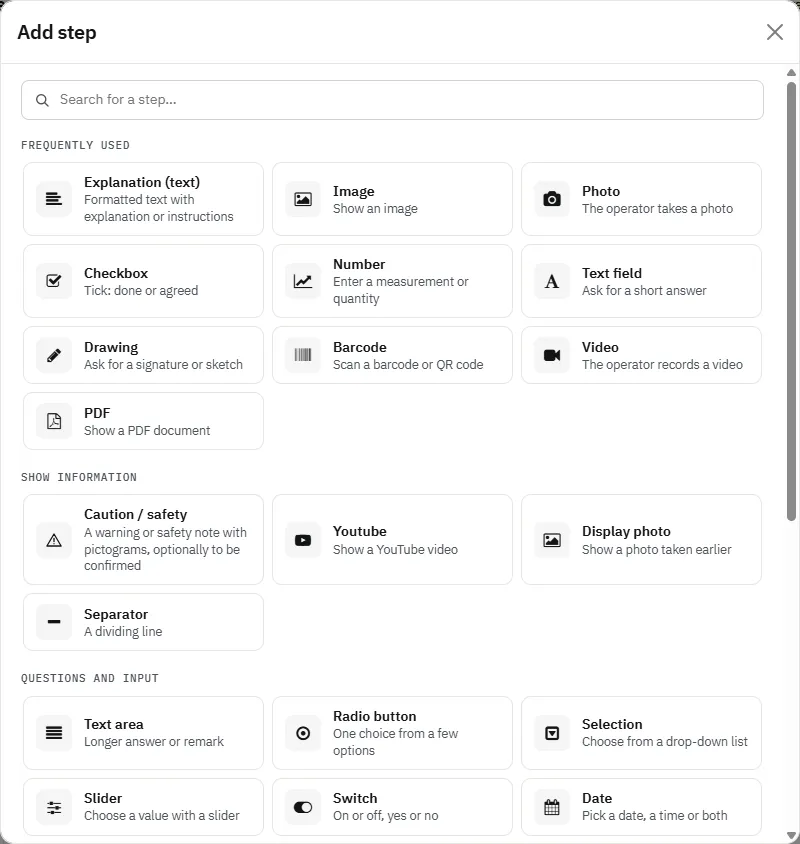
- Pick a step. Click Add step and choose the step in the step picker. The search field finds a step by name, description or a related word: scrap finds the Counter, four eyes the Colleague check.
- Set the label. Give the step a short, clear label: the operator sees it above the step. Click the step to change its label, width or required setting.
- Publish. Changes are saved as a draft automatically. Click Publish to make the new version available to operators.
Tick off
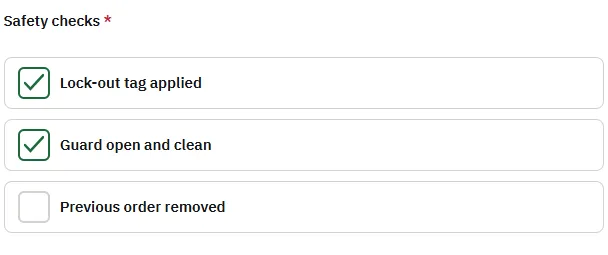
The Tick off step lists one or more options the operator ticks, for example the checks of a start-up round: Lock-out tag applied, Guard closed, Previous order removed. Use it to confirm that something was done. When every point needs its own OK or Not OK answer, use the Checklist step instead.
Add it to a work instruction
- Open the work instruction in the editor and click Add step under the last step.
- Choose Tick off in the group Frequently used of the step picker, or type the name or a related word in its search field. Steps your organisation uses often are listed first, under Frequently used.
- Give the step a clear label and add one option per check. Use Add option for more options; the operator ticks each one that applies. Under Deviating answers, tick the options that count as a deviation.
- Switch on Required in the step properties when the operator must fill it in before going on.
Date
The Date step asks for a date, a time or both, for example the moment of an inspection, the start of a changeover or the expiry date of a batch. The operator uses the picker of the device or the Now button.
Add it to a work instruction
- Open the work instruction in the editor and click Add step under the last step.
- Choose Date in the group Questions and input of the step picker, or type the name or a related word in its search field. Steps your organisation uses often are listed first, under Frequently used.
- Choose on the step whether it asks for a date, a date and time or a time, and use a label that says which moment is meant, for example Start of the changeover. The Now button fills in the current moment.
- Switch on Required in the step properties when the operator must fill it in before going on.

Signature
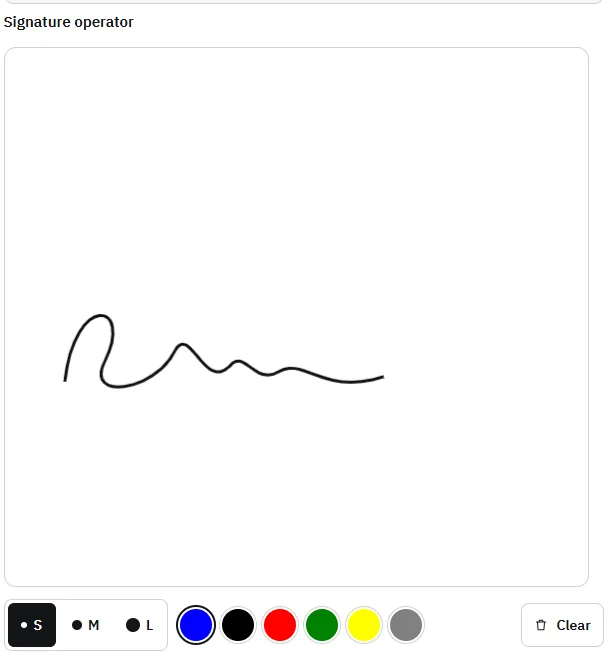
The Signature step lets the operator sign, or draw a sketch, with a finger or the mouse, for example to sign off a changeover. The drawing is stored with the run as an image, together with the user and the time. When a second person has to confirm a step, use the Colleague check: the colleague confirms with their own password.
Add it to a work instruction
- Open the work instruction in the editor and click Add step under the last step.
- Choose Signature in the group Frequently used of the step picker, or type the name or a related word in its search field. Steps your organisation uses often are listed first, under Frequently used.
- Label it with what is signed or drawn, for example Signature operator. The drawing is stored with the run as an image.
- Switch on Required in the step properties when the operator must fill it in before going on.
Number
The Number step asks for a measured value or a quantity, such as a run-out in mm or a torque in Nm. Give it a Unit: the operator sees the unit right after the field, and the run details, the print page, the export and the version compare show it with the value. With a minimum and maximum, a value outside the limits is marked straight away.
Add it to a work instruction
- Open the work instruction in the editor and click Add step under the last step.
- Choose Number in the group Frequently used of the step picker, or type the name or a related word in its search field. Steps your organisation uses often are listed first, under Frequently used.
- Type the unit in the Unit field on the step, for example mm or Nm; the export then names the column Run-out (mm). Fill in a Minimum and Maximum in the step properties when the value has limits. Under Outside the range you choose what a value outside them does: block (the default: it is marked and Next and Finish only work once it is corrected) or continue and record it as a deviation. Phones show a numeric keyboard for this step.
- Switch on Required in the step properties when the operator must fill it in before going on.

Spot on a floor plan
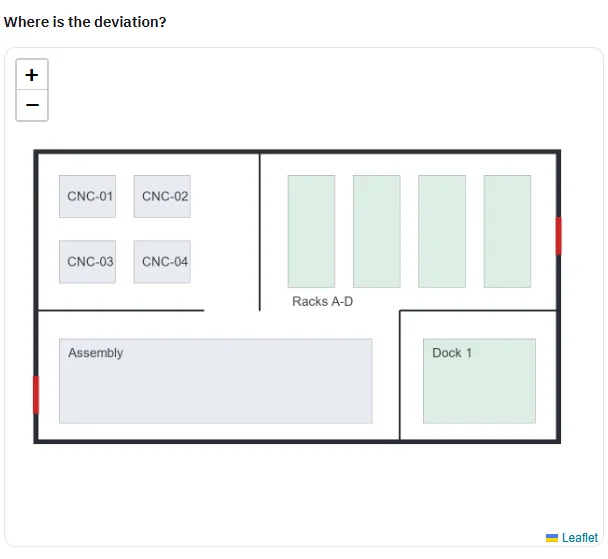
The Spot on a floor plan step shows an image you upload, such as a floor plan, a drawing or a photo of a machine, and the operator taps the spot that matters: where a leak is, which bolt is damaged. The marked spot is stored with the run.
Add it to a work instruction
- Open the work instruction in the editor and click Add step under the last step.
- Choose Spot on a floor plan in the group Capture with the device of the step picker, or type the name or a related word in its search field. Steps your organisation uses often are listed first, under Frequently used.
- Upload a floor plan or drawing as the map, or choose one you uploaded before. The operator marks the spot on it.
- Switch on Required in the step properties when the operator must fill it in before going on.
Single choice
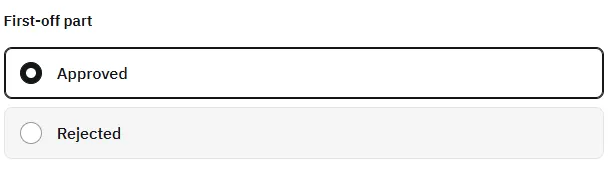
The Single choice step shows a short list of options of which the operator picks exactly one, for example Approved or Rejected for a first-off part. Options you mark as deviating flag the run, and a later page can appear only after a certain answer. For a plain OK or Not OK, the OK / Not OK step is quicker to set up.
Add it to a work instruction
- Open the work instruction in the editor and click Add step under the last step.
- Choose Single choice in the group Questions and input of the step picker, or type the name or a related word in its search field. Steps your organisation uses often are listed first, under Frequently used.
- Add the options the operator chooses from; only one can be selected, for example Approved or Rejected. Under Deviating answers, tick the options that count as a deviation: a run with such an answer is marked.
- Switch on Required in the step properties when the operator must fill it in before going on.
Drop-down list
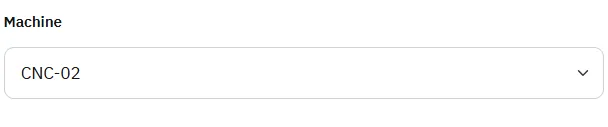
The Drop-down list step lets the operator pick one option from a list, handy for longer lists such as machines, moulds or suppliers. A list with more than 12 options gets a search field above it in run mode: the operator types part of a name and only the matching options remain; when one option is left, it is selected. The stored list stays complete.
Add it to a work instruction
- Open the work instruction in the editor and click Add step under the last step.
- Choose Drop-down list in the group Questions and input of the step picker, or type the name or a related word in its search field. Steps your organisation uses often are listed first, under Frequently used.
- Add the options of the list with Add option. Long lists are fine: from 13 options the operator gets a search field above the list. Options ticked under Deviating answers mark the run as deviating.
- Switch on Required in the step properties when the operator must fill it in before going on.
Slider
The slider input field allows a user to select a value by sliding a control along a scale when completing a Standard Operating Procedure.
Add it to a work instruction
- Open the work instruction in the editor and click Add step under the last step.
- Choose Slider in the group Questions and input of the step picker, or type the name or a related word in its search field. Steps your organisation uses often are listed first, under Frequently used.
- Use it for an estimate on a scale, and say the scale in the label, for example Coolant level (%).

Switch
The switch input field allows a user to select options with a switch button when completing a Standard Operating Procedure.
Add it to a work instruction
- Open the work instruction in the editor and click Add step under the last step.
- Choose Switch in the group Questions and input of the step picker, or type the name or a related word in its search field. Steps your organisation uses often are listed first, under Frequently used.
- Use a label that can be answered with on or off, for example Coolant topped up. Tick a position under Deviating answers when it counts as a deviation.
- Switch on Required in the step properties when the operator must fill it in before going on.

Text field
The Text field step asks for a short answer on one line, such as an order number, a batch number or a name.
Add it to a work instruction
- Open the work instruction in the editor and click Add step under the last step.
- Choose Text field in the group Frequently used of the step picker, or type the name or a related word in its search field. Steps your organisation uses often are listed first, under Frequently used.
- Use it for a short answer such as an order or batch number. For longer remarks, use the Long text step.
- Switch on Required in the step properties when the operator must fill it in before going on.

Long text
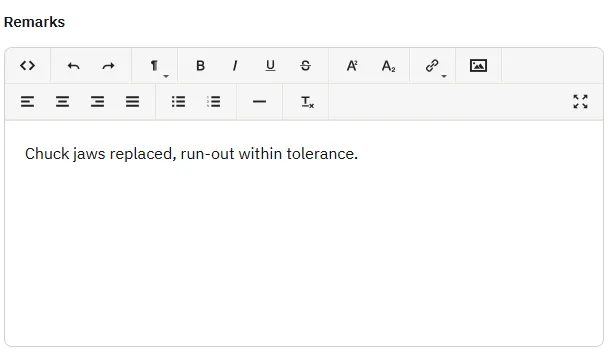
The Long text step asks for a longer answer over several lines, such as a remark at the end of a shift or the description of a fault, with basic formatting.
Add it to a work instruction
- Open the work instruction in the editor and click Add step under the last step.
- Choose Long text in the group Questions and input of the step picker, or type the name or a related word in its search field. Steps your organisation uses often are listed first, under Frequently used.
- Use it for remarks and descriptions. The operator can format the text, for example with a list.
- Switch on Required in the step properties when the operator must fill it in before going on.
Timer
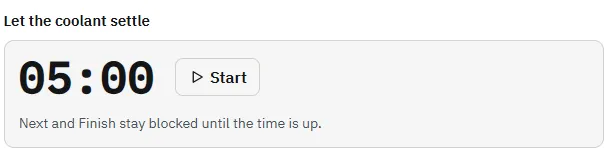
The Timer step counts down a set time that the operator starts, for example a drying, curing or settling time. With Wait required the operator cannot go on before the time is up; without it, stopping early is recorded as a deviation with the time actually waited.
Add it to a work instruction
- Open the work instruction in the editor and click Add step under the last step.
- Choose Timer in the group Measure and count of the step picker, or type the name or a related word in its search field. Steps your organisation uses often are listed first, under Frequently used.
- Type the duration on the step as minutes and seconds (5:00) or hours, minutes and seconds (1:30:00). Leave Wait required on when the time may not be shortened; the phone vibrates and beeps when the time is up.
- Switch on Required in the step properties when the operator must fill it in before going on.
Stopwatch
The Stopwatch step measures how long something takes: the operator taps Start and Stop, and the measured time is stored with the run. Give it a norm in seconds under Minimum and Maximum; a time outside it is recorded as a deviation, or blocks Next when you set it to block. The stopwatch keeps running with the screen off.
Add it to a work instruction
- Open the work instruction in the editor and click Add step under the last step.
- Choose Stopwatch in the group Measure and count of the step picker, or type the name or a related word in its search field. Steps your organisation uses often are listed first, under Frequently used.
- Set the norm under Minimum and Maximum in the properties, in seconds (90 is 1:30). The stopwatch keeps running with the screen off; the measured time is in the run details and the export.
- Switch on Required in the step properties when the operator must fill it in before going on.
Measurement series
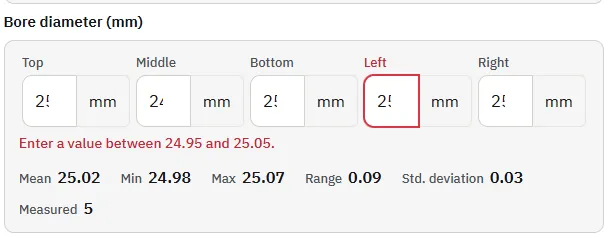
The Measurement series step asks for several measurements of the same kind against one norm, for example the thickness in four corners or five torque readings. Each measurement gets its own field with its label (or Measurement 1, 2, ...) and the unit; under the fields the mean, minimum, maximum, range and standard deviation follow every value typed. A value outside the norm is marked and recorded as a deviation per measurement, without stopping the operator.
Add it to a work instruction
- Open the work instruction in the editor and click Add step under the last step.
- Choose Measurement series in the group Measure and count of the step picker, or type the name or a related word in its search field. Steps your organisation uses often are listed first, under Frequently used.
- Set the number of measurements (2 to 30), the unit and the decimals on the step, and the norm as minimum and maximum in the step properties. Under Outside the range you choose whether a value outside the norm only counts as a deviation (the default) or also blocks Next and Finish. Give the measurements labels such as Corner 1 or Left when the place matters; the export adds a column with the average.
- Switch on Required in the step properties when the operator must fill it in before going on.
Materials
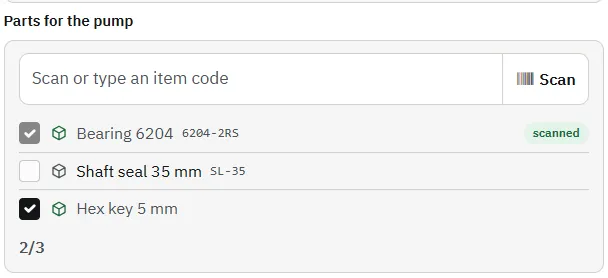
The Materials step lists the parts and tools a job needs, each line with an optional item code. Choose how the operator confirms the list: show it only, tick off every line, or scan the item codes. With scanning, a scanned code ticks its line and a code that is not on the list is reported straight away; a line without a code is ticked by hand. Made required, the operator can only go on when every line is ticked, and the export shows how many lines were ticked and which are missing.
Add it to a work instruction
- Open the work instruction in the editor and click Add step under the last step.
- Choose Materials in the group Measure and count of the step picker, or type the name or a related word in its search field. Steps your organisation uses often are listed first, under Frequently used.
- Add one line per part or tool and give it the item code on its label or packaging; a list copied from a spreadsheet (text and code in two columns) is pasted in one go. Choose Scan the item codes when the right part matters, Tick off every line for a simple checklist.
- Switch on Required in the step properties when the operator must fill it in before going on.
OK / Not OK
The OK / Not OK step asks one check with two large buttons, OK and Not OK, and if you allow it a third: N/A. It is the quickest way to put a go / no-go check in a work instruction: big enough to tap with gloves on, and impossible to misread afterwards. On Not OK you can require a remark, a photo or both before the operator can go on.
Example: In a changeover on a lathe, Chuck jaws clean and undamaged is an OK / Not OK step with a remark required on Not OK. The operator finds a burr on jaw 2, taps Not OK and types Burr on jaw 2; the run carries a deviation before the first part is made.
Add it to a work instruction
- Open the work instruction in the editor and click Add step under the last step.
- Choose OK / Not OK in the group Questions and input of the step picker, or type the name or a related word in its search field. Steps your organisation uses often are listed first, under Frequently used.
- Type the check as its name, phrased so that OK is the good answer, for example Guard interlock works. Under Required on Not OK choose Nothing, A remark, A photo or A remark and a photo.
- Switch on N/A allowed when the check does not always apply, for example a check of an option that not every machine has.
- Switch on Required in the step properties when the operator must fill it in before going on.
What the run records
The answer, and with Not OK the remark and the photo. Not OK is recorded as a deviation: the run gets a label in the runs overview and the answer appears under Deviations in the run details and in the dashboard. The export shows OK, Not OK with the remark, or N/A, and the step log has a line for every tap. A later page can be set to appear only after Not OK, for example a repair page.
Tip: Combine it with a Follow-up task set to Only show on a Not OK on this page: the operator then hands the repair to a colleague in the same run.
Checklist
The Checklist step is a list of check points in one step, each answered OK, Not OK or N/A in its own row. It suits rounds with many short checks: a start-up check, a line clearance, a 5S round or a first-article inspection. The operator sees how many points are answered and how many are Not OK, and a point answered Not OK can require a remark.
Example: A line clearance before a new batch: Previous labels removed, Line empty of product, Waste bins emptied, Correct packaging at the line. Every point answered Not OK becomes its own deviation, named after the point, so the dashboard shows which point fails most often.
Add it to a work instruction
- Open the work instruction in the editor and click Add step under the last step.
- Choose Checklist in the group Questions and input of the step picker, or type the name or a related word in its search field. Steps your organisation uses often are listed first, under Frequently used.
- Type the check points under Check points, one per line; paste a list from a spreadsheet or an old paper form to add several at once (at most 50).
- Switch on Remark required on Not OK when every Not OK needs an explanation, and N/A allowed when a point may not apply.
- Switch on Required in the step properties when the operator must fill it in before going on.
What the run records
The answer to every point and the remarks. The run details and the print page show a summary such as 3 OK, 1 Not OK, 0 N/A with every point and its answer; the export adds the Not OK points with their remarks. Every Not OK point is a separate deviation in the runs overview, the run details and the dashboard.
Tip: Keep each point short and phrase it so that OK is the good answer. Need a photo on Not OK, or a page that only appears after one answer? Use separate OK / Not OK steps for those checks.
Rating
The Rating step asks the operator for a score of 1 to 5 stars, or 1 to 3 or 1 to 10. Use it for judgements that are not a measurement: the surface finish of a first part, how clean a work station is after a 5S round, how well a handover went. Words for the lowest and highest score, such as Poor and Excellent, make the scale the same for everyone.
Example: Surface finish of the first part with 5 stars and a minimum of 3. A rating of 2 is shown as below the minimum and recorded as a deviation; the operator can still go on, because the score may be the truth.
Add it to a work instruction
- Open the work instruction in the editor and click Add step under the last step.
- Choose Rating in the group Questions and input of the step picker, or type the name or a related word in its search field. Steps your organisation uses often are listed first, under Frequently used.
- Choose the Number of stars (3, 5 or 10) and fill in Word for the lowest and Word for the highest, for example Poor and Excellent.
- Fill in a Minimum when a low score must be followed up; a rating below it is a deviation. Leave it empty for no minimum.
- Switch on Required in the step properties when the operator must fill it in before going on.
What the run records
The number of stars, shown as 4 of 5 in the run details and on the print page and as a number in the export, so you can average it in a spreadsheet. A rating below the minimum is a deviation. A later page can be set to appear only for a certain score.
Tip: Explain on the page what each score means, for example with a reference photo, so two operators give the same part the same score.
Counter
The Counter step counts with large minus and plus buttons around the number, made for counting on the shop floor with gloves on. The operator taps once for every piece, or types the number. Give it a unit and a norm: a count outside the norm is marked and recorded as a deviation, but it never stops the operator.
Example: Rejected parts at the end of an order, with the unit pcs and a maximum of 5. The operator taps plus for every scrapped part; at 6 the count is marked as outside the norm and the run shows a deviation.
Add it to a work instruction
- Open the work instruction in the editor and click Add step under the last step.
- Choose Counter in the group Measure and count of the step picker, or type the name or a related word in its search field. Steps your organisation uses often are listed first, under Frequently used.
- Set the Start value (usually 0), how much one tap adds under Per tap and the Unit, for example pcs or boxes. Not below 0 is on by default; switch it off for a correction that can be negative.
- Fill in a Minimum and / or Maximum in the step properties as the norm of the count.
- Switch on Required in the step properties when the operator must fill it in before going on.
What the run records
The number with its unit, for example 12 pcs. The run details and the print page show the norm, and Outside the norm when that applies; the export puts the number in a column named after the step and its unit. Taps within a few seconds are one line in the step log. A count outside the norm is a deviation.
Tip: Made required, the operator has to tap or type at least once: a counter left untouched at its start value does not count as an answer. When nothing was rejected, the operator types 0.
Colleague check
The Colleague check step lets a second person confirm one step on the operator's device. The operator taps Have a colleague sign off; the colleague chooses their own name and types their own password, and the run then shows who checked the step and when. The colleague is always someone other than the operator, and the password is only checked, never stored. It is the four-eyes principle for a single critical step, next to the approval of a whole run.
Example: Torque checked by a colleague after the clamping bolts of a fixture are tightened to 45 Nm. With the step required, the operator cannot go on until a colleague has checked the torque on the spot and signed off.
Add it to a work instruction
- Open the work instruction in the editor and click Add step under the last step.
- Choose Colleague check in the group Questions and input of the step picker, or type the name or a related word in its search field. Steps your organisation uses often are listed first, under Frequently used.
- Type under What does the colleague check? exactly what is confirmed, for example Clamping bolts tightened to 45 Nm; the colleague sees this text when signing off.
- Switch on Required in the step properties when the operator must fill it in before going on.
What the run records
Checked by with the name of the colleague and the date and time, in the run details, on the print page and in the export, and a line in the step log. The server checks the sign-off again when the run is saved: a sign-off by the operator themselves, or one that was changed on the device, is not accepted. After repeated wrong passwords, signing off is paused for a quarter of an hour.
Tip: Signing off needs a connection, because the server checks the password; a work instruction with a required colleague check therefore cannot be started offline. To have a whole run approved after it is completed, see approval and review.
Follow-up task
The Follow-up task step lets the operator hand work to a colleague without leaving the work instruction: a repair, a part to order, a fault for maintenance. The operator switches on Create task, adjusts the title, adds a description and chooses the colleague and the due date. The task is made when the run is completed and appears under Tasks for the colleague, with a link back to the run.
Example: After a Not OK on Chuck jaws clean and undamaged, a follow-up task Replace the chuck jaw for the maintenance engineer, due in 7 days. With Only show on a Not OK on this page the step stays hidden as long as every check on the page is OK.
Add it to a work instruction
- Open the work instruction in the editor and click Add step under the last step.
- Choose Follow-up task in the group Links of the step picker, or type the name or a related word in its search field. Steps your organisation uses often are listed first, under Frequently used.
- Fill in a Default title, a Default assignee (or Nobody (the operator chooses)) and the number of days under Due in (days); the operator can change them during the run.
- Switch on Only show on a Not OK on this page to show the step only after a Not OK in an OK / Not OK or Checklist step on the same page.
- Switch on Required in the step properties when the operator must fill it in before going on.
What the run records
The task itself, created once when the run is completed, never for a run that is only paused. The run details show Task created with the title, the colleague and the due date and a link to the task; the export shows the title and the colleague. No e-mail is sent: the colleague sees the task under Tasks and in the counter in the side bar.
Tip: Made required, the task is always created. The step also works without a connection: the task is created as soon as the completed run reaches the server.
Other input types
Try the Work Instruction App for free
Create your first digital work instruction in minutes. 30-day free trial, no credit card required.
No credit card · Cancel any time · Live in 5 minutes
Frequently asked questions about user input
Tick off, date, signature, number with a unit, spot on a floor plan, single choice, drop-down list, slider, switch, text field and long text, plus OK / Not OK, checklist, rating, counter, colleague check and follow-up task. The group Measure and count adds the timer, stopwatch, measurement series and materials. A page can combine several steps.
Yes. The Signature step lets the operator sign or sketch on the screen; it is saved with the run, together with the user and the time. When a second person must confirm a step, the Colleague check asks that colleague for their own password.
In Analyze, per executed instruction: every value with the user who entered it and the time. For photos, barcodes, audio and location, see device input.
Yes. In the page settings, choose Only show when and pick a choice step on an earlier page and the option it must equal, for example a repair page only when a check is answered with No. A hidden page is skipped by Next and Previous, does not count in the progress, and its required steps do not block Finish. In the run details it is shown as skipped.