In short: autonomous maintenance is the pillar of TPM (Total Productive Maintenance) in which operators take over the daily care of their own machine. The core is the CIL routine: clean, inspect, lubricate. A good CIL standard lists every point on the machine with the method, tool, time, frequency and a clear OK criterion with a reference photo, so every operator does the same round and every abnormality is written down and followed up.
What is autonomous maintenance?
In many factories the split is simple: production runs the machine, maintenance fixes it when it breaks. Autonomous maintenance changes that split. The operator, who stands next to the machine all day, becomes responsible for its basic condition: keeping it clean, spotting loose bolts, leaks, noise and wear early, and lubricating the points that need it. Maintenance keeps the technical repairs and planned overhauls, and gets more time for them because the small stuff is handled at the machine.
The idea behind it is that most breakdowns announce themselves. Dirt hides a crack, a dry chain starts to wear, a leaking fitting slowly loses oil. Someone who cleans the machine by hand sees and feels those signs long before they become a stoppage. Cleaning is therefore not a housekeeping job but an inspection.
What are the steps of autonomous maintenance?
TPM literature usually describes autonomous maintenance in seven steps. You do not have to follow them rigidly, but they show the order in which a team grows into the role:
- Initial cleaning: clean the machine thoroughly, inside and out, and tag every abnormality you find.
- Eliminate sources of contamination and hard-to-reach places: stop leaks and spills at the source and make points easier to clean, inspect and lubricate.
- Draft cleaning, inspection and lubrication standards: write down what is done, how, with what, how long it takes and how often.
- General inspection: train operators in how the machine works (drives, pneumatics, hydraulics, lubrication, electrics) so they know what to look for.
- Autonomous inspection: operators run the inspection rounds themselves and improve the standards.
- Standardisation: extend the approach to the workplace around the machine, such as tools, materials and quality checks.
- Autonomous management: the team maintains and improves its own standards as part of daily work.
The CIL routine is born in steps 1 to 3 and becomes daily practice from step 5. The rest of this guide focuses on that routine.
How do you set up a CIL routine?
1. Choose one machine as a pilot
Start with one machine that matters, has known small problems and has a team willing to try. A pilot on one machine shows what works before you roll it out, and gives you a real example to show other teams. Involve the operators of all shifts and one person from maintenance from the start.
2. Clean the machine thoroughly and tag abnormalities
Do the initial cleaning together, with the machine safely isolated. Every time someone finds something wrong (a loose cover, an oil leak, a missing bolt, a damaged cable, a blocked lubrication point) it gets a tag and a line on a list. This list is the first proof that cleaning is inspection, and it is the starting point of the follow-up described further on.
3. Remove sources of contamination and hard-to-reach points
Ask for every dirty area where the dirt comes from and whether it can be stopped: a leaking seal, product spill, a missing guard. Then look at points that are hard to reach: can a cover get a window, can a lubrication point be moved or extended, can a level glass be added? Every improvement here makes the daily round shorter and more reliable.
4. Define the CIL points on the machine
Walk around the machine and list every point that needs regular cleaning, inspection or lubrication. Give each point a number and mark it on the machine itself, for example with a numbered label or a coloured marking for lubrication points. A drawing or overview photo of the machine with the numbers helps operators find each point quickly.
5. Write the CIL standard for each point
For each point, write down what is done and when it is right. A complete CIL standard contains per point:
- Point: number and name, with its location on the machine.
- Task: clean, inspect, lubricate, or a combination.
- Method: how exactly, in one or two short sentences.
- Tool and material: cloth, brush, grease gun, the type of grease or oil.
- Time: a target time in minutes.
- Frequency: every shift, daily, weekly or monthly.
- OK criterion with reference photo: what the right state looks like, for example "oil level between the min and max marks", with a photo of exactly that.
- Safety condition: whether the machine must be stopped or isolated first.
The reference photo is the part that makes the difference. "Chain tension OK" means something different to every operator; a photo of a correctly tensioned chain with the allowed sag marked does not. The same principles apply as for any good work instruction: one action per step, concrete values and photos from the operator's point of view. Our guide on how to write a work instruction goes into those in detail.
6. Build the checklist and test it with the operators
Turn the standard into a checklist per frequency: a short round for every shift or day, a longer one for each week or month. Let an operator who was not involved in writing it do the round and watch where they hesitate. Adjust the wording, the photos and the order until the round can be done without asking.
7. Follow up every abnormality
Write down every abnormality found during a round, decide who solves it and close the loop. Operators solve what they can themselves (tighten, clean, refill); the rest goes to maintenance. The next section describes how to keep this from becoming a pile of forgotten notes.
8. Review the standard regularly
After a few weeks, look at the rounds together. Which points never show anything and can move to a lower frequency? Which ones keep finding problems and need a root-cause fix? Update the standard, the photos and the checklist, and publish the new version so everyone works from the same one.
What does a CIL checklist look like?
Below is an example for a fictional packaging machine with a conveyor, a sealing unit and a pneumatic cylinder. The values are examples; take the real criteria from the machine manual and from your own maintenance department.
| No. | Point | Task | Method and tool | OK criterion (with reference photo) | Time | Frequency |
|---|---|---|---|---|---|---|
| 1 | Infeed conveyor belt | Clean and inspect | Wipe with a damp cloth, machine stopped | No product residue, no cracks or frayed edges | 3 min | Every shift |
| 2 | Sealing jaws | Clean | Brush off residue with the brass brush, jaws cold | Sealing surface clean and smooth | 4 min | Every shift |
| 3 | Drive chain | Inspect and lubricate | Check tension, apply chain oil with the brush | Sag within the marked range, chain lightly oiled | 3 min | Weekly |
| 4 | Gearbox oil level | Inspect | Read the level glass | Level between min and max marks, no leakage underneath | 1 min | Daily |
| 5 | Air service unit | Inspect | Read pressure gauge, check water separator | Pressure in the green zone, no water in the bowl | 1 min | Daily |
| 6 | Bearing housings | Lubricate | Two strokes of the grease gun per nipple, grease type as on the label | Fresh grease visible at the seal, no overheating | 3 min | Monthly |
| 7 | Guards and covers | Inspect | Visual check and hand test | All bolts present and tight, interlock works | 2 min | Daily |
A table like this works well as the master standard. On the shop floor, however, a long table on paper tends to be ticked off in one go at the end of the round. That is where a digital checklist helps.
How do you do autonomous maintenance digitally?
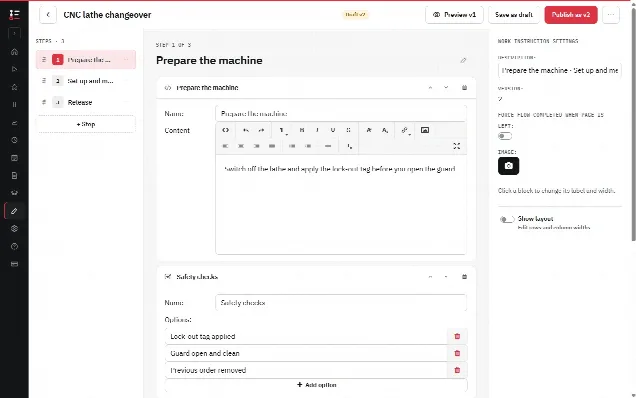
A digital work instruction turns the CIL standard into a guided round that the operator follows on a phone or tablet at the machine. In the Work Instruction App it works like this:
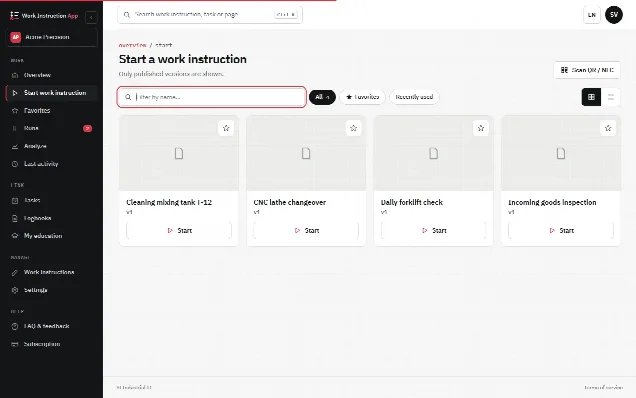
- Start at the machine. A QR code or NFC tag on the machine opens the right CIL round directly, so there is no searching and no risk of doing the round for the wrong machine. See work instructions with NFC tags.
- One page per CIL point. Each page shows the point, the method and the reference photo of the OK state, so the operator compares what they see with what it should be.
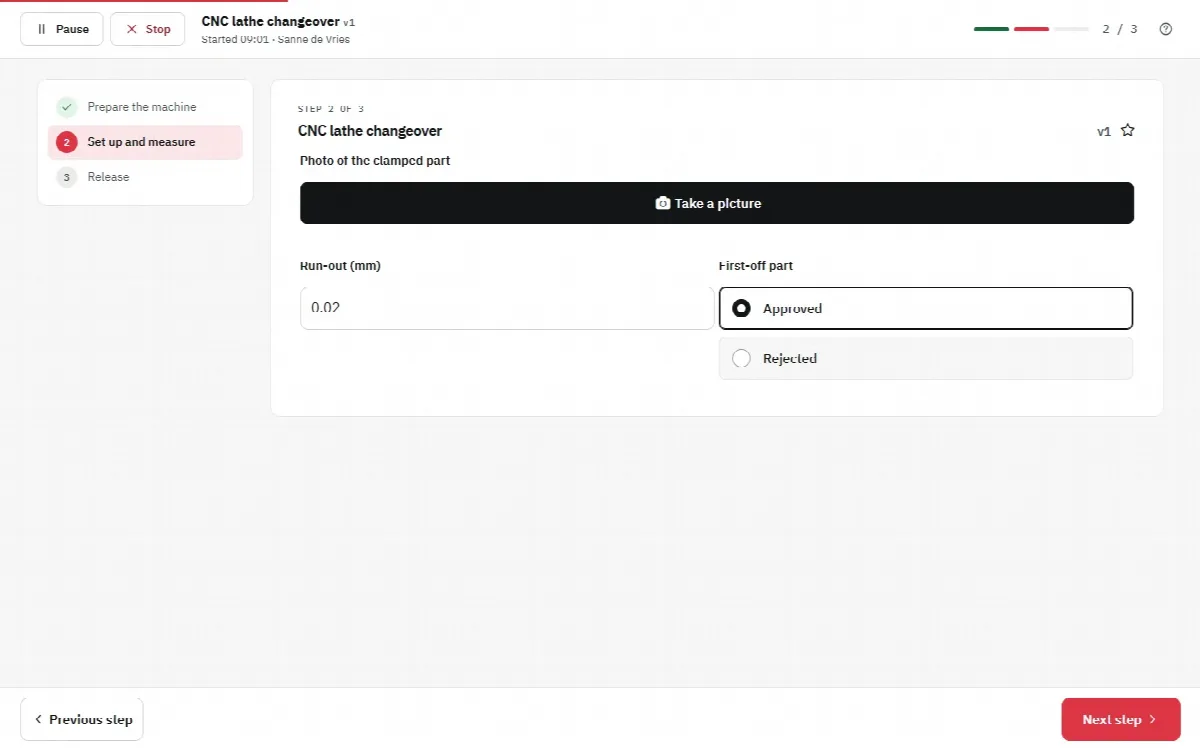
- Required checks. A checkbox or a choice "OK / not OK" per point, marked as required, so the round cannot be finished with points skipped. Where a value matters, such as air pressure, a number field records the reading.
- Photo of abnormalities. When a point is not OK, the operator takes a photo and adds a short description in a text field.
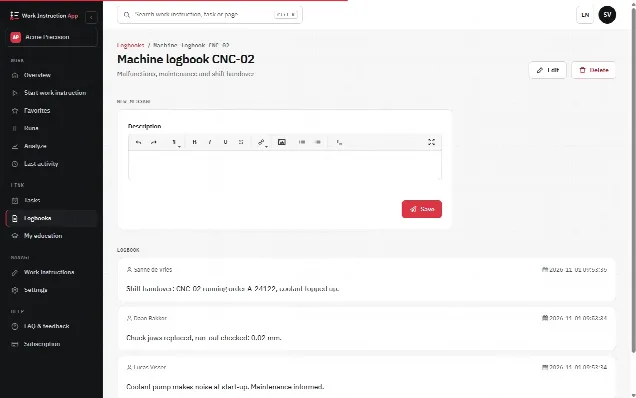
- Logbook entry. The operator adds a message about the abnormality to the logbook of that machine, where maintenance and the next shift can read it and add their own messages.
Every completed round is stored with the user, the start and end time, the duration, the version of the standard and every answer and photo. That replaces the paper list on the machine and gives a history per machine that you can filter by period and user. Read more about why this matters in why digital work instructions, or see the digital checklist page.
How do you follow up abnormalities?
Autonomous maintenance stops working the moment operators notice that their findings disappear. Three simple rules keep the loop closed:
- Every abnormality gets an owner. Either the operator solves it right away and notes it, or it is handed over to maintenance with the photo and description.
- Review open items daily. In the daily shift meeting or start-of-shift talk, go through the logbook messages of the past day and decide what happens with each one.
- Close visibly. When an item is fixed, add a message to the logbook saying what was done. The operator who reported it sees that it mattered.
Look for patterns as well. If the same point keeps showing the same problem, the standard or the machine needs a structural fix, not another note. That brings you back to step 3: remove the source.
Where does autonomous maintenance pay off most?
CIL routines are most valuable on machines where small defects quickly cause stoppages or quality problems: packaging lines, presses, injection moulding machines, CNC machines, filling lines. They also help where several shifts share one machine, because the standard and the logbook make sure every shift treats the machine the same way. More examples for production environments are on the manufacturing page.
Start small: one machine, one daily round of five to ten points, a reference photo per point. Once operators see that their findings are followed up, the routine spreads by itself.