In short: an LMRA (Last Minute Risk Analysis) is a short safety check that the person doing the job carries out at the workplace, just before the work starts. It asks whether the hazards are known, the measures are in place and the work can be done safely right now; if not, the work does not start. Done digitally, the LMRA opens from a QR code or NFC tag at the workplace, cannot be skipped, and leaves a record of every check that a supervisor can actually review.
What is an LMRA?
The Last Minute Risk Analysis comes from Dutch and Belgian safety practice. It is best known from VCA (in German-speaking countries SCC), the safety checklist for contractors and companies that work with them on construction sites, in plants and in maintenance. The idea is simple: no matter how well a job was prepared in the office, the situation on the spot can be different. A pipe is still under pressure, a colleague is working one level higher, the barrier tape is gone, the rain has made the floor slippery. The LMRA is the moment where the person doing the work stops for a minute, looks around and decides consciously whether it is safe to start.
An LMRA is not a replacement for the formal risk assessment. In the Netherlands every employer must have a risk inventory and evaluation (RI&E, article 5 of the Arbeidsomstandighedenwet); in Germany the employer must carry out and document a Gefährdungsbeurteilung (section 5 of the Arbeitsschutzgesetz). Those assessments are made in advance and determine the measures. The LMRA checks, on the spot and at the last moment, that those measures are really in place and that nothing new has come up.
When do you do an LMRA?
The rule of thumb is: before every task with a real risk, and again whenever the situation changes. Typical moments:
- At the start of maintenance, repair or cleaning work on machines and installations.
- Before work at height, in confined spaces, near moving parts or with hazardous substances.
- When a service engineer or rental technician arrives at a customer's site that they do not know.
- After a break, when the job is continued by another person or when the circumstances change (weather, other teams nearby, a different machine state).
- Before a task that is done rarely, where routine is missing.
Which questions belong in an LMRA?
Most LMRA cards ask the same handful of questions. Adapt them to your work, but keep them short. A typical set:
- Do I know what the job is and how to do it (work instruction, work permit, instructions from the supervisor)?
- Do I know the hazards of this task and of this location?
- Are the agreed measures in place (isolation, lock-out, barriers, ventilation, gas measurement)?
- Do I have the right tools and personal protective equipment, and are they in good condition?
- Is the work area safe: access, escape route, floor, lighting, other people working nearby?
- Do I know what to do in an emergency and who to call?
- Can I do this work safely right now? If not: stop, and do not start.
The last question is the one that matters. Everything before it helps the person reach an honest answer.
Why do paper LMRA cards fail?
Paper LMRA cards are cheap and everybody knows them. Their weakness is not the questions, but what happens to the answers. In practice the card is ticked from memory in the van, stays in a pocket or ends up in a box that nobody reads. When something goes wrong, nobody can say whether the LMRA was done, by whom, at what time and with which answers. And because nobody reviews the cards, recurring problems (the same missing barrier, the same faulty ladder) are never noticed.
| Aspect | Paper LMRA card | Digital LMRA |
|---|---|---|
| Start | Card from a pile or a pocket, often filled in afterwards | Scan of the QR code or NFC tag at the workplace opens the right LMRA |
| Questions | One generic card for every task | Questions per task or location, always the current version |
| Completeness | Questions can be skipped | Required checkboxes: a half-completed LMRA cannot be finished |
| Evidence | A tick | Photo of the situation, signature, time and user |
| Stop-work rule | Printed on the back, if at all | Shown in the step where the "no" is given |
| Review | Box in the site office, rarely read | Overview of runs per task, user and period |
| Changes | Reprint and redistribute | Publish a new version; the old one stays traceable |
How do you set up a digital LMRA?
A digital LMRA is a short work instruction with mostly confirmation steps. These seven steps take you from paper card to a working digital LMRA.
1. Decide where and for which tasks the LMRA is needed
Start by listing the tasks and locations where an LMRA is required, using your risk assessment as the source. One generic LMRA for all work is a start, but a specific LMRA per task type (working at height, work on electrical installations, work in a confined space) asks better questions and gets more honest answers.
2. Put the questions in short steps with required checkboxes
Turn every LMRA question into a checkbox that the user has to tick, and mark it as required. Keep one theme per step (for example "Isolation and lock-out" or "Work area"), with a short explanation text above the checkboxes that says what "OK" means. A required checkbox prevents the LMRA from being finished with open questions.
3. Add the stop-work rule as an explicit question
Make the final question a yes/no choice: "Can I do this work safely right now?" Place an explanation right next to it that says what to do on "no": do not start, make the situation safe if you are allowed to, and call the supervisor (with the name or phone number in the text). Because the rule appears in the step itself, nobody has to remember the back of a card.
4. Ask for a photo of the situation
Add a photo block where the user takes a picture of the work area just before starting: the barrier, the lock-out tag on the isolator, the scaffold tag. A photo takes seconds and says more afterwards than ten ticks. For deviations, add a text field where the user describes what was wrong and what was done about it.
5. Close with a signature
End the LMRA with a signature block. The signature makes the decision personal: "I have checked this, and I am starting." For work with two people, add a second signature block for the colleague or the supervisor who gives the go-ahead; they sign on the same device, because the run belongs to the person who started it.
6. Put a QR code or NFC tag at the workplace
Attach a QR code or NFC tag to the machine, the installation, the entrance of the confined space or the rental equipment. Scanning it opens exactly the LMRA that belongs there, so the user does not have to search and the check happens where the risk is, not in the canteen.
7. Review the records and improve the questions
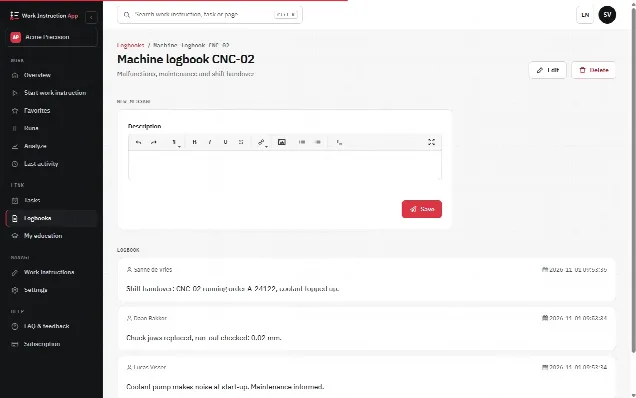
Every completed LMRA is a record with user, time, answers, photo and signature. Have the supervisor or the safety officer look at the runs per task and period on a fixed moment, for example in the weekly toolbox meeting. Recurring remarks are input for the risk assessment, and questions that are always answered the same way may be better as a measure than as a question. Improve the LMRA and publish a new version.
In practice with digital work instructions
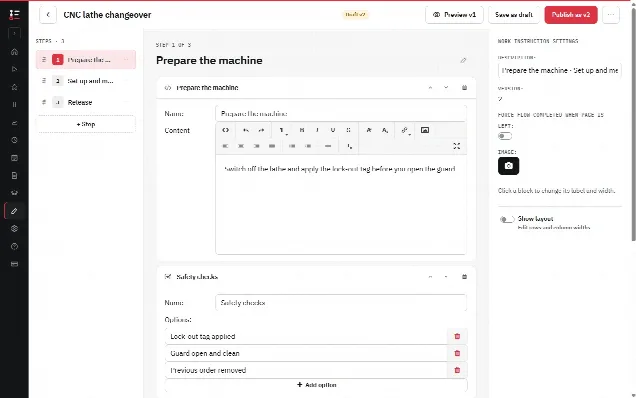
In the Work Instruction App an LMRA is an ordinary work instruction. You build it in the browser editor from blocks: explanation text, checkboxes, a radio button for the stop-work question, a photo, a text field for remarks and a signature, each of which can be marked as required. The draft saves automatically; when you publish, the app creates a new version and keeps the older versions traceable.
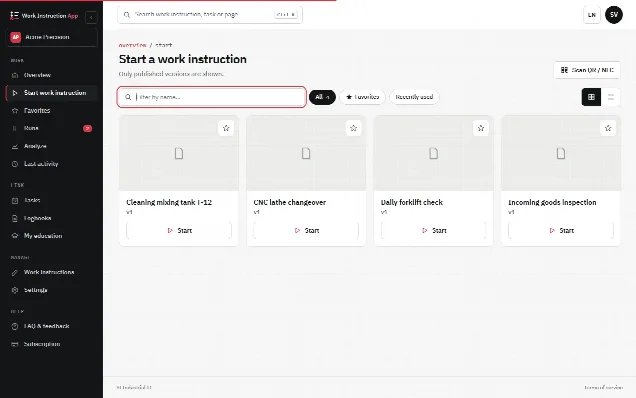
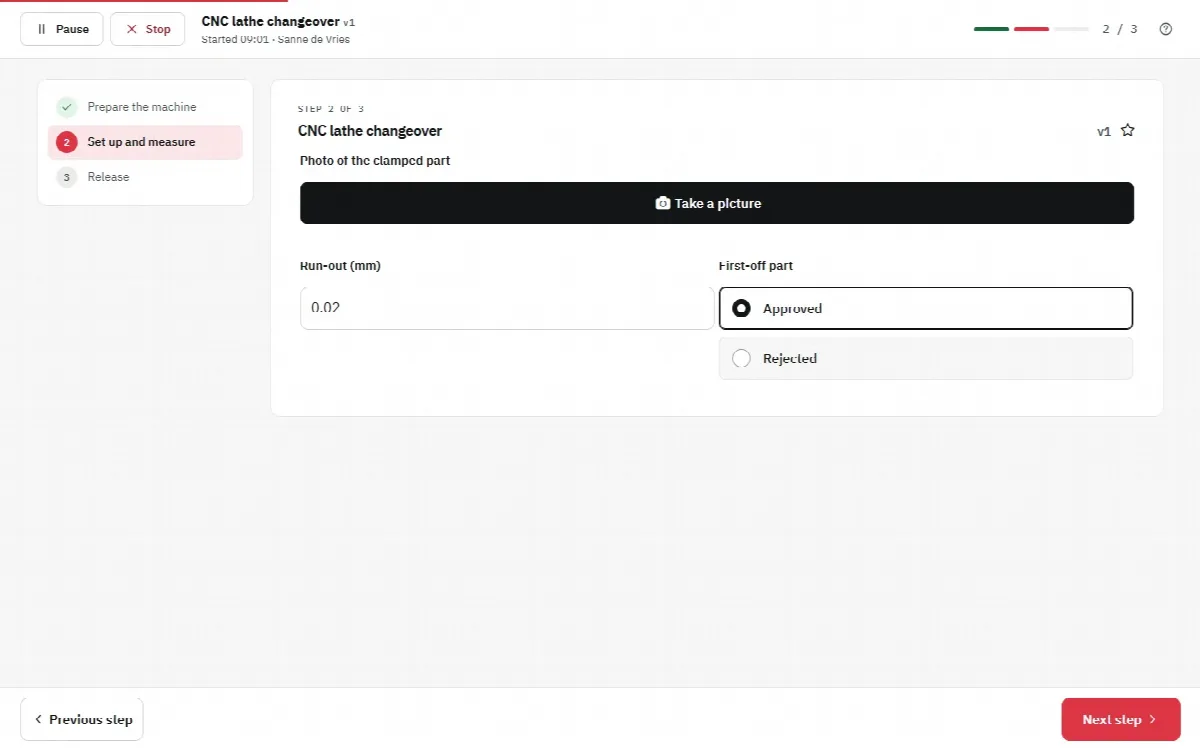
On the shop floor the user starts the LMRA by scanning a QR code or an NFC tag at the workplace (the Android app can write the NFC tags), or picks it from favourites. Every run records the user, start and end time, the version and every answer, photo and signature, and completed runs can be filtered per work instruction, user and period, which gives you the evidence for an audit. With the block "start another work instruction" the LMRA can lead straight into the work instruction for the job itself. For service and rental companies whose technicians work at changing locations, the rental page shows how a tag on the equipment opens the right instruction at the customer's site.
The app does not decide whether work is safe and does not send alarms by itself: the person on the spot decides, and the LMRA makes that decision structured and recorded. What the instruction can do is give a "no" a consequence: tick "no" on the stop-work question as a deviating answer, so the run is marked in the runs overview, and add a step that is only shown when the answer is "no", with what to do next and whom to call. To write the steps of the job instruction that follows the LMRA, see how to write a work instruction.
Common mistakes with LMRAs
- Too many questions. An LMRA with thirty items becomes a ticking exercise. Five to eight good questions per task type are usually enough.
- No consequence of "no". If a "no" leads nowhere, people stop giving it. Make the stop-work rule explicit and back it up as a manager.
- Doing the LMRA away from the workplace. The point is to look at the actual situation. A tag at the workplace keeps the check where it belongs.
- Never looking at the results. An LMRA that nobody reviews is paperwork. Reviewing the records is what turns it into a safety tool.