In short: a forklift daily check is a short inspection the driver does before the first use of the truck in a shift. The driver walks around the truck, checks fluids, tyres, forks, chains, mast, brakes, steering, horn, lights, seat belt and the battery or gas system, and does not use the truck when a safety defect is found. Done digitally, every check is recorded per truck with the driver, the time, the answers and a photo of each defect.
Why is a daily forklift check required?
A forklift is work equipment, and work equipment has to be in a safe condition every time it is used. In the European Union this follows from Directive 2009/104/EC on the use of work equipment: the employer must make sure equipment is suitable and safe, and that equipment exposed to conditions that cause deterioration is inspected so that defects are found and remedied in good time. The national rules build on that directive:
- Netherlands: the Arbobesluit (article 7.4a) requires equipment that deteriorates with use to be inspected as often as needed to keep it in good condition, and the results of those inspections must be recorded in writing.
- Germany: the Betriebssicherheitsverordnung (BetrSichV, section 4(5)) requires that work equipment is checked for obvious defects before each use, and DGUV Vorschrift 68 on industrial trucks (section 9) says in so many words that the driver checks the truck daily before use for recognisable defects, does not use a truck with a safety defect and reports defects to the employer immediately. Section 37 adds a recurring inspection by a competent person at least once a year.
- United States and United Kingdom: OSHA 29 CFR 1910.178(q)(7) requires trucks to be examined before being placed in service, at least daily (after each shift when used around the clock), and HSE's guidance L117 on rider-operated lift trucks describes pre-use checks by the operator.
The yearly inspection by a competent person does not replace the daily check. A tyre can be damaged, a hydraulic hose can start leaking or a chain can be damaged on any given day. The daily check is how you find that before somebody drives the truck. It is also part of what the employer can show an inspector: not only that a check exists, but that it was actually done.
What does a forklift daily checklist contain?
The exact list depends on the type of truck (electric, LPG, diesel, reach truck, pallet truck) and on the manufacturer's manual, which always comes first and lists the daily checks for that model. The table below covers the points that appear on almost every checklist. Split them into a visual check with the truck switched off and a function check with the truck switched on.
| Area | What to check | Typical reason to stop |
|---|---|---|
| General condition | Walk around the truck: body, overhead guard, load backrest, data plate and capacity plate readable | Damaged overhead guard, missing capacity plate |
| Fluids | Hydraulic oil level, engine oil and coolant (combustion trucks), brake fluid where visible | Level below minimum, fluid on the floor |
| Tyres and wheels | Tread, cuts, chunks missing, pressure on pneumatic tyres, wheel nuts | Deep cuts, exposed cords, loose wheel nuts |
| Forks | Cracks at the heel, bent or worn forks, locking pins in place, both forks at the same height | Visible crack, missing locking pin |
| Chains | Even tension on both chains, no damaged or seized links, anchor points secure | Damaged link, one chain clearly slack |
| Mast and hydraulics | Lift, lower and tilt through the full range without load; smooth movement, no jerks or noises | Mast drops or creeps, jerky movement |
| Brakes | Service brake and parking brake hold the truck; inching pedal where present | Brake does not hold, long pedal travel |
| Steering | Full turn left and right, no excessive play, no heavy spots | Play or stiffness in the steering |
| Horn, lights and warning devices | Horn, headlights, rear lights, beacon, reversing alarm, blue spot where fitted | Horn or reversing alarm not working |
| Seat and seat belt | Seat secure, belt latches and retracts, operator presence switch works | Belt damaged or does not latch |
| Battery (electric) | Charge level, cables and connector undamaged, battery secured, no electrolyte spills | Damaged cable or connector |
| Gas system (LPG) | Cylinder secured, valve and hose undamaged, no smell of gas | Smell of gas, damaged hose |
| Leaks | Look under the truck and at hoses, cylinders and the mast for oil, fuel or coolant | Active leak of hydraulic oil or fuel |
| Controls and displays | Warning lights go out after start, hour meter readable, controls return to neutral | Warning light stays on |
Keep the list short enough to do in a few minutes. A checklist that takes a quarter of an hour will be ticked from memory. If your trucks differ a lot, make one checklist per truck type rather than one long list with many "not applicable" answers.
How do you carry out the daily check, step by step?
The order below works for most counterbalance trucks. Adjust it to your own fleet and the manual of the manufacturer.
1. Identify the truck
Start by recording which truck you are checking, by its fleet number or serial number. Without the truck number a checklist is worthless: you cannot see the history of one truck or prove that this truck was checked today.
2. Do the visual check with the truck switched off
Walk around the truck with the key out and look at the body, the overhead guard, the forks, the chains and the tyres. Look under the truck for puddles of oil, coolant or fuel, and check that the capacity plate is present and readable.
3. Check fluid levels and the energy source
Check the hydraulic oil level and, for combustion trucks, engine oil, coolant and fuel. On an electric truck check the charge level, the cables and the connector; on an LPG truck check that the cylinder is secured and that there is no smell of gas.
4. Do the function check with the truck switched on
Get in, fasten the seat belt and start the truck, then test the horn, lights, warning devices, steering and both brakes. Lift, lower and tilt the mast through its full range without a load and listen for unusual noises.
5. Record the result and sign
Confirm every point as OK or not OK and sign the check with your name. A not OK answer always needs a short description and preferably a photo, so that the person who repairs the truck knows what to look for.
6. Act on defects before you drive
If any point affects safety, do not use the truck: report the defect, tag the truck out and inform your supervisor. Only use the truck again after the defect has been repaired and released by someone who is authorised to do so.
What should a driver do when a check fails?
The rule is simple and should be written on the checklist itself: a truck with a defect that affects safety is not used. In practice that means four things:
- Do not use the truck. Not "just this one pallet", not "carefully". The driver decides on the spot and needs nobody's permission to stop.
- Report the defect immediately to the supervisor or the maintenance department, with the truck number, what is wrong and, if possible, a photo.
- Tag the truck out. Hang a clearly visible "Do not use" tag on the steering wheel or the controls, remove the key and, where your procedure requires it, disconnect the battery. Everyone on the next shift must see at a glance that this truck is out of service.
- Release the truck formally. After repair, the person who is authorised to release the truck records what was done and removes the tag. Then the next driver starts with a normal daily check.
Defects that do not affect safety (a cracked mirror housing, a missing cup holder) are still reported, so they are repaired before they get worse, but the truck may stay in use. Make that distinction explicit on the checklist, otherwise every driver draws the line in a different place.
Why do paper forklift checklists fall short?
Most sites start with a paper card on a clipboard or in a holder on the truck. That works, until someone asks a question. Which truck had a leaking cylinder last month? Was truck 7 checked on the night shift? Who reported the brake problem and when was it repaired? On paper the answers are spread over cards that are filed, lost or filled in afterwards. Defects are written down but not passed on, and a recurring problem on one truck is invisible because nobody reads all the cards side by side.
A digital checklist does not change the check itself. It changes what happens to the result: it is recorded with the time and the name of the driver, and you can find it again per truck.
In practice with digital work instructions
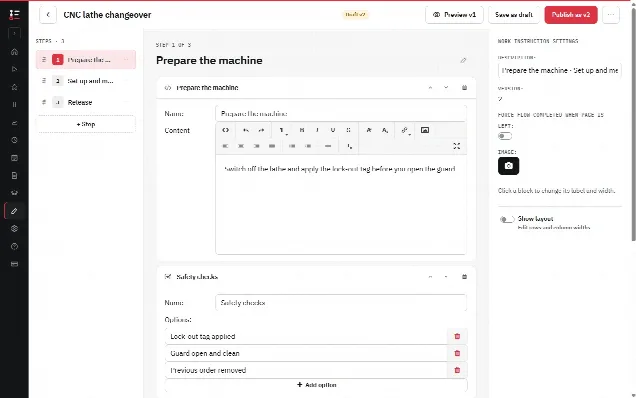
In the Work Instruction App you build the daily check as a work instruction with one step per area of the table above. This is how a typical set-up looks:
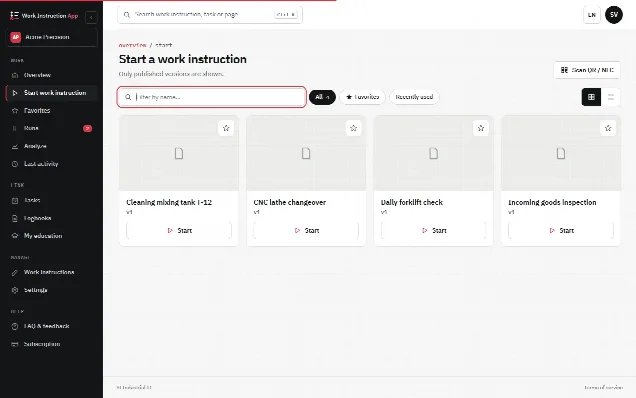
- A QR code or NFC tag on every truck. The driver scans the code on the truck and the daily check for that truck opens directly on a phone or tablet, see work instructions via NFC. Give each truck its own copy of the check (for example "Daily check truck 7") with its own code: the history of one truck is then simply the runs of that work instruction. With one shared check for all trucks, let the driver record the truck number in the first step, typed in or scanned from a barcode on the truck.
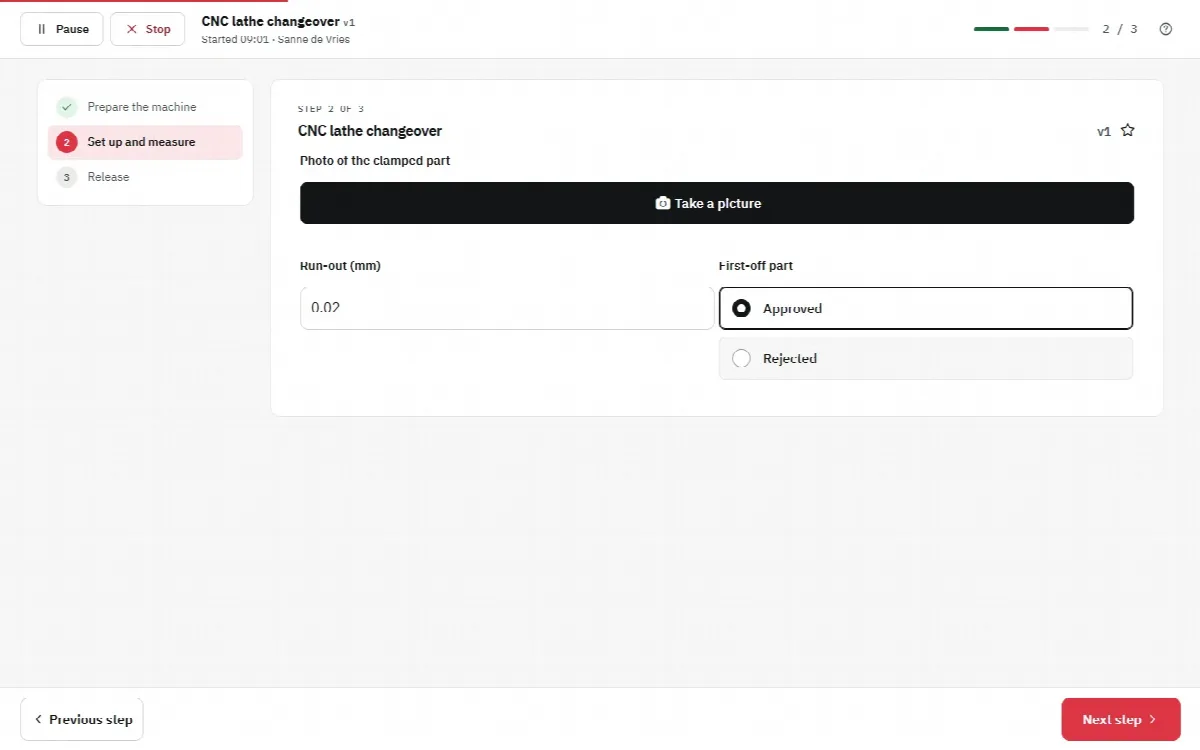
- Required checks. Each point is a checkbox, radio button (OK / not OK) or number field (hour meter). Marked as required, the driver cannot continue to the next page or finish the check until every point is answered.
- A photo of every defect. Add a photo step next to the questions, so that a not OK answer comes with a picture of the actual problem.
- Not OK leads somewhere. In the editor, tick "not OK" as a deviating answer: the check is then marked as a deviation in the runs overview. Add a page that is only shown when a safety point is answered "not OK", with the stop rule: do not use the truck, report the defect and tag the truck out.
- A reminder when the check is missed. Give the check a schedule, for example 06:00 and 14:00 on weekdays with a grace period. When no completed check exists in time, the Manage users get a task and an e-mail for that missed check.
- Signature. A signature step at the end confirms who did the check. The app already records the user, start and end time, duration and the version of the checklist that was used.
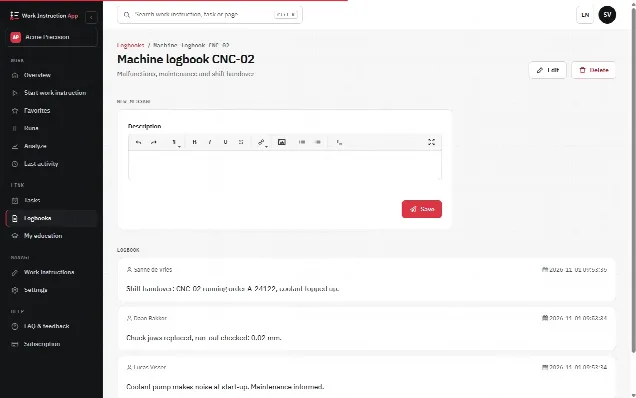
- History per truck. Completed checks can be filtered per work instruction, user and period. For messages that are not part of the standard check (a noise that comes and goes, a repair that was done) each truck can have its own logbook where drivers and maintenance staff add notes.
When you change the checklist (a new truck type, an extra point after an incident) you publish a new version; earlier checks stay linked to the version that was used at the time, see digital checklists. For warehouses and distribution centres with many trucks and several shifts, the page on work instructions for logistics shows how this fits into the rest of the daily routine. If you are new to writing instructions, the guide how to write a work instruction explains how to phrase each check so that every driver interprets it the same way.
Tips for a daily check that drivers actually do
- Start from the manual. The manufacturer's manual lists the daily checks for that model. Your checklist puts them in a practical order and does not invent a list of its own.
- Show what OK looks like. A photo of a correctly tensioned chain or the minimum mark on the dipstick helps a new driver more than a sentence.
- Make the stop rule visible. Put "Not OK on a safety point: do not use the truck, report and tag out" at the top of the check, not at the bottom.
- Close the loop. Drivers keep reporting defects only when they see that reports lead to repairs. Discuss open defects in the shift start meeting.
- Review the list after incidents. If a defect caused a near miss and was not on the list, add it and publish a new version.
To get started on paper or to use as the basis for your digital checklist, a printable forklift daily checklist template is available for download below.