In short: poka-yoke means designing work so that a mistake cannot be made or is noticed immediately. Most examples are physical, such as a jig that only accepts the part one way round, but a work instruction can be error-proofed too: required checks, photo evidence, values with a minimum and maximum, a barcode with an expected value, one action per step and blocking a run for someone without the right training. Software prevents errors of omission and choice; it cannot replace a physical poka-yoke where a wrong action is dangerous or expensive.
What is poka-yoke?
Poka-yoke is Japanese for "mistake-proofing". The term was made popular by Shigeo Shingo, who developed it as part of the Toyota Production System. The starting point is that people make mistakes, however well trained and motivated they are. Instead of asking them to pay more attention, you change the process so that the mistake becomes impossible, or at least visible at the moment it happens, before it turns into a defect.
Classic examples are everywhere: a USB plug that only fits one way, a fuel nozzle that does not fit the wrong tank, a fixture with a pin that blocks a part placed upside down, a machine that only starts with both hands on the buttons. In manufacturing, poka-yoke is one of the main tools for first time right: getting it right the first time instead of finding and fixing defects later.
What is the difference between control and warning poka-yoke?
Poka-yoke devices are usually divided into two types by how they respond to an error:
- Control (also called prevention): the process stops until the error is corrected. The part does not fit, the press does not close, the next step cannot be opened. The person has no choice but to fix it.
- Warning (also called detection): the error is signalled, with a light, a sound or a message, but the process can continue. It relies on the person reacting to the signal.
Control is stronger, so use it wherever stopping is possible and the consequences of an error are serious. Warning is the right choice where stopping would cause more harm than the error, or where the decision needs human judgement. In a work instruction the same distinction applies: some blocks stop the operator until they are filled in, others only make an error visible and traceable.
Which errors can a work instruction prevent?
Work instructions are mostly about errors that physical poka-yoke cannot catch, because they have no shape: forgetting a step, skipping a check under time pressure, picking the wrong instruction, measuring but not recording, or doing a task you have not been trained for. On paper, nothing stops any of these. A tick box on a printed form can be ticked without looking, and a missing value is only noticed when someone reads the form, if anyone does.
A digital work instruction changes that, because the instruction is also the input. The ten examples below show how. For each one the table further down lists the error it prevents and whether it is a control or a warning.
10 poka-yoke examples for work instructions
1. Required checks
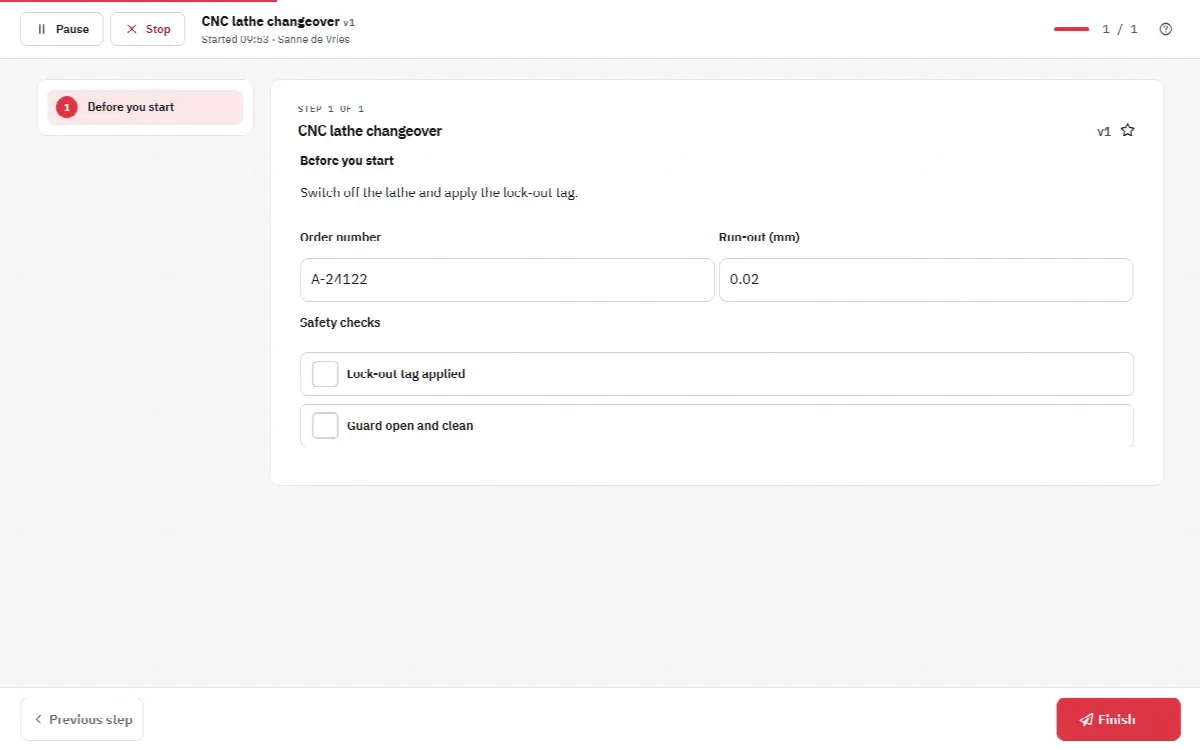
Make every check that must not be skipped a required checkbox. The operator can only continue once it is ticked. This is a control poka-yoke against the most common procedural error: skipping a step because "it is always fine".
2. Scan the barcode of the part
Ask the operator to scan the barcode or QR code on the part, batch or order instead of typing it. Typing errors disappear, and the scanned code is stored with the run, so a wrong part is visible and traceable. Give the barcode block an expected value and it becomes a control: a different code is marked and Next and Finish only work once the right part is scanned. Without an expected value the scan is a warning: it records what was used, and the operator or the reviewer still has to notice a mismatch.
3. Photo evidence
For results that are easier to show than to describe (a connection, a label position, a clean machine), ask for a required photo. The operator cannot finish without taking it, and the photo stays with the run. It also changes behaviour: people look more carefully at a result they have to photograph.
4. Number fields with a minimum and maximum
Ask for the measured value in a number field and put the tolerance in the label, for example "Torque (25-30 Nm)". The operator sees the limits at the moment of entering the value, and the actual value is recorded instead of an "OK" tick. Set the same limits as minimum and maximum of the block: a value outside them is marked and the operator cannot go on with Next or Finish until it is corrected. Mark it as required so the measurement cannot be skipped.
5. One action per step
Write one action per step instead of a paragraph with five instructions. Long steps are where actions get lost: the operator reads the first half, starts working and never comes back to the second half. Short steps with their own confirmation make it obvious when something has been missed.
6. A reference photo of the correct result
Show a photo of what "right" looks like next to the step: the correct orientation, the correct cable route, the acceptable weld. Comparing with a picture is faster and more reliable than interpreting a description. Combined with example 3, the operator compares their own result with the reference before confirming.
7. Start the right instruction with a QR code or NFC tag
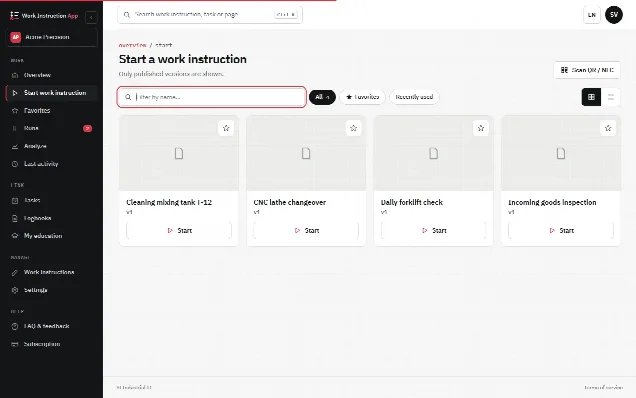
Put a QR code or NFC tag on the machine or location, so scanning it opens the instruction for that machine. Nobody has to search a list or pick between similar names, and the latest published version is always the one that opens. This prevents the error of using the wrong instruction or an old printout.
8. Signature at release
Ask for a signature at the moment of release or handover: after a changeover, a repair or a first-article check. A required signature block means the run cannot be completed without someone explicitly taking responsibility. It does not make the work itself right, but it makes "I thought someone else had checked it" impossible.
9. A block that requires training
Add a required-training block to instructions for critical tasks. Users who do not have the certificate for the linked job profile cannot run the instruction. This is a control poka-yoke at the level of the person: the system, not the shift planning, makes sure only qualified people do the job.
10. Pause and resume instead of skipping
Interruptions are a classic source of skipped steps: the operator is called away and, on return, continues one step too far. Let operators pause the run and resume it later with everything entered so far still there (the run reopens at the step where it was paused), instead of closing it and starting from memory.
Which error does each example prevent?
| Example | Error it prevents | Type |
|---|---|---|
| 1. Required checks | A check skipped under time pressure | Control |
| 2. Scan the part barcode | Typing errors, untraceable part or batch, wrong part | Warning (control with an expected value) |
| 3. Photo evidence | Result not looked at, no proof afterwards | Control (if required) |
| 4. Number field with minimum and maximum | Value not measured, out-of-tolerance reading not noticed | Control (if required) |
| 5. One action per step | Actions lost in long steps | Warning |
| 6. Reference photo | Wrong orientation or wrong result accepted | Warning |
| 7. Start by QR code or NFC tag | Wrong or outdated instruction used | Control |
| 8. Signature at release | Release without anyone taking responsibility | Control (if required) |
| 9. Required training | Untrained person doing a critical task | Control |
| 10. Pause and resume | Steps skipped after an interruption | Warning |
Where does software stop?
Be honest about the limits. A work instruction can force someone to confirm, measure, scan or photograph, but it cannot hold their hands. It does not stop a part from being mounted upside down, a wrong screw from being used or a guard from being bypassed. A required checkbox can still be ticked without looking, if someone is determined to.
That is why the order of solutions matters. A practical way to decide is:
- Can the error be designed out? Change the product or the part so the mistake is impossible. This is the strongest solution.
- Can a physical poka-yoke stop it? A jig, a pin, a sensor, an interlock or a colour-coded tool. Use this wherever the error is dangerous or expensive.
- Can the work instruction stop or detect it? Required blocks, photos, scans, training checks. Use this for errors of omission and choice, and to record evidence that the physical poka-yoke was checked.
- Only then: rely on attention. Training and awareness are necessary, but they are the weakest barrier, not the first.
The two levels work well together. A typical combination: the fixture prevents wrong placement, and the work instruction contains a required step "check that the sensor of the fixture is working (green light)", with a photo. The physical poka-yoke does the preventing; the instruction makes sure the poka-yoke itself is not forgotten.
Poka-yoke in practice with digital work instructions
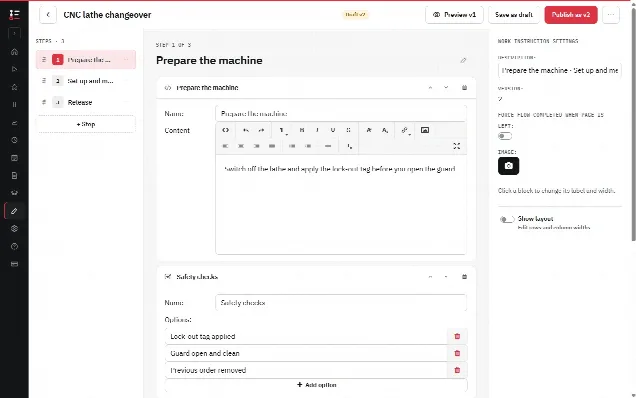
In the Work Instruction App every example above is a block you add in the browser editor. Checkbox, number, text field, photo, drawing/signature and barcode scan blocks can be marked as Required; Next and Finish then only work once the block has been filled in. Display photo and image blocks show the reference photo of the correct result. A required-training block links the instruction to a job profile, so users without the certificate cannot run it. The input blocks are described on the pages about user input and device input (camera, barcode scan, location).
Operators start the instruction from the overview or by scanning a QR code or NFC tag at the machine, and they can pause a run and resume it later. Every run records the user, start and end time, the version and every answer, photo and signature, so completed runs can be filtered per work instruction, user and period. If an instruction mainly collects data, see also digital forms. For a general introduction to building good instructions, read how to write a work instruction, and see how production teams use it on the manufacturing page.
Where should you start?
Take the last three quality issues or near misses that were caused by a step being skipped, a value not measured or the wrong instruction being used. For each one, pick the strongest poka-yoke from the list above that would have stopped it, add it to the instruction and publish a new version. Then look at the errors that remain and ask whether they need a physical solution instead.